Installing Pro Version
In order to utilize the pro plugin, you’ll need to install and activate it. The process is just like installing a normal plugin.
Step 1: Download Plugin
Download the plugin ZIP file from the link available within your purchase history or purchase receipt email.


Step 2: Deactivate Free Version
Within your WordPress dashboard, go to “Plugins” and deactivate Free version if it is active. It is recommended to remove the Free version since less plugins means less work for WordPress.

Step 3: Upload Plugin
Upload the plugin ZIP file downloaded in step 1. Click on “Plugins > Add New”, then click on “Upload Plugin”.
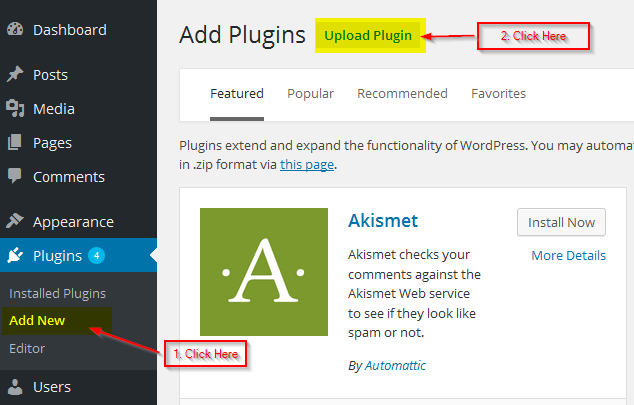
Select the plugin ZIP file using the “Browse” button. Then click “Install Now”.

Step 4: Activate Plugin
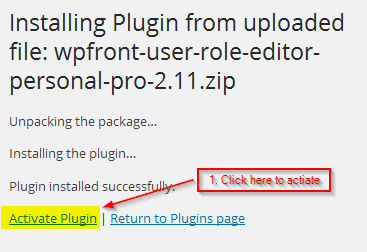
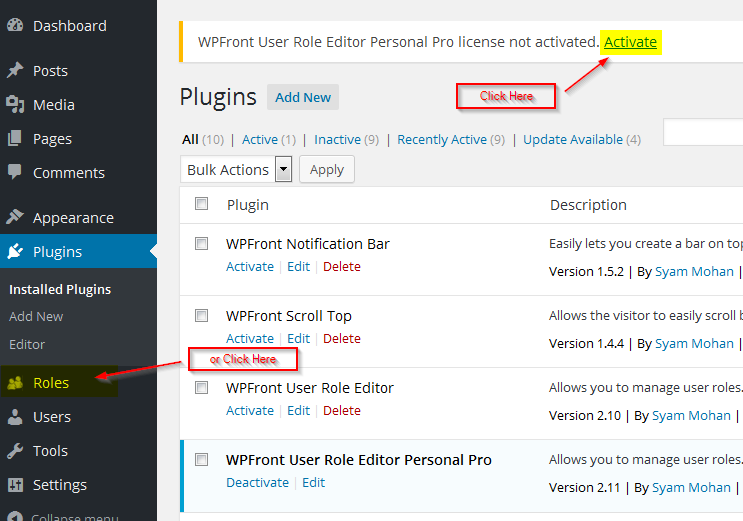
Activate plugin by clicking on the “Activate Plugin” link available after upload. You can also activate it by clicking the “Activate” link available within your plugins page.
Step 5: Activate License
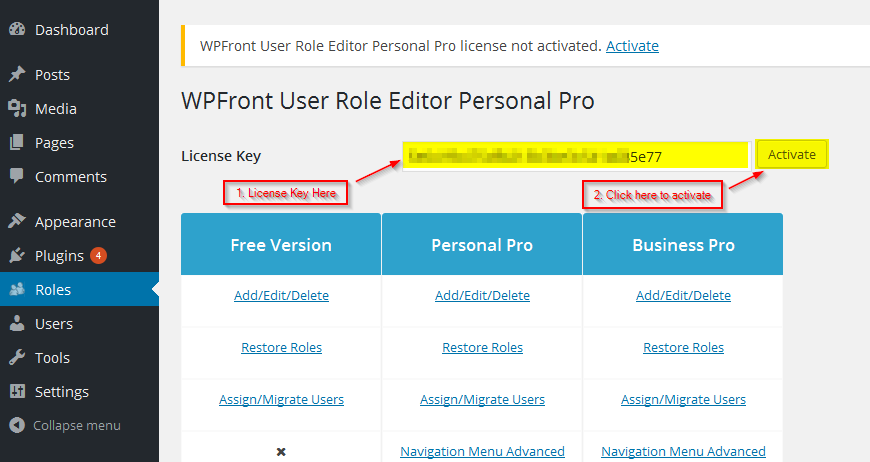
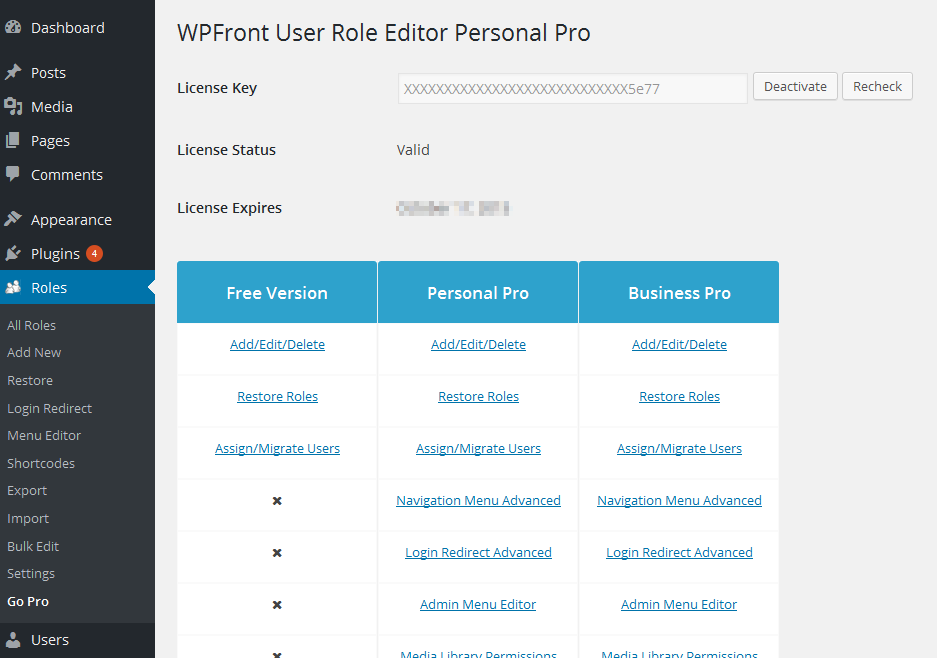
You can activate the license by clicking on the “Activate” link available within the banner or using the “Roles” menu.
Enter your license key within the text box, then click “Activate” button.
In a multisite installation, these instructions needs to be followed within network admin.
Topics
Posts/Pages Extended Permissions
Media/Attachment File Permissions
Content Restriction Shortcodes
