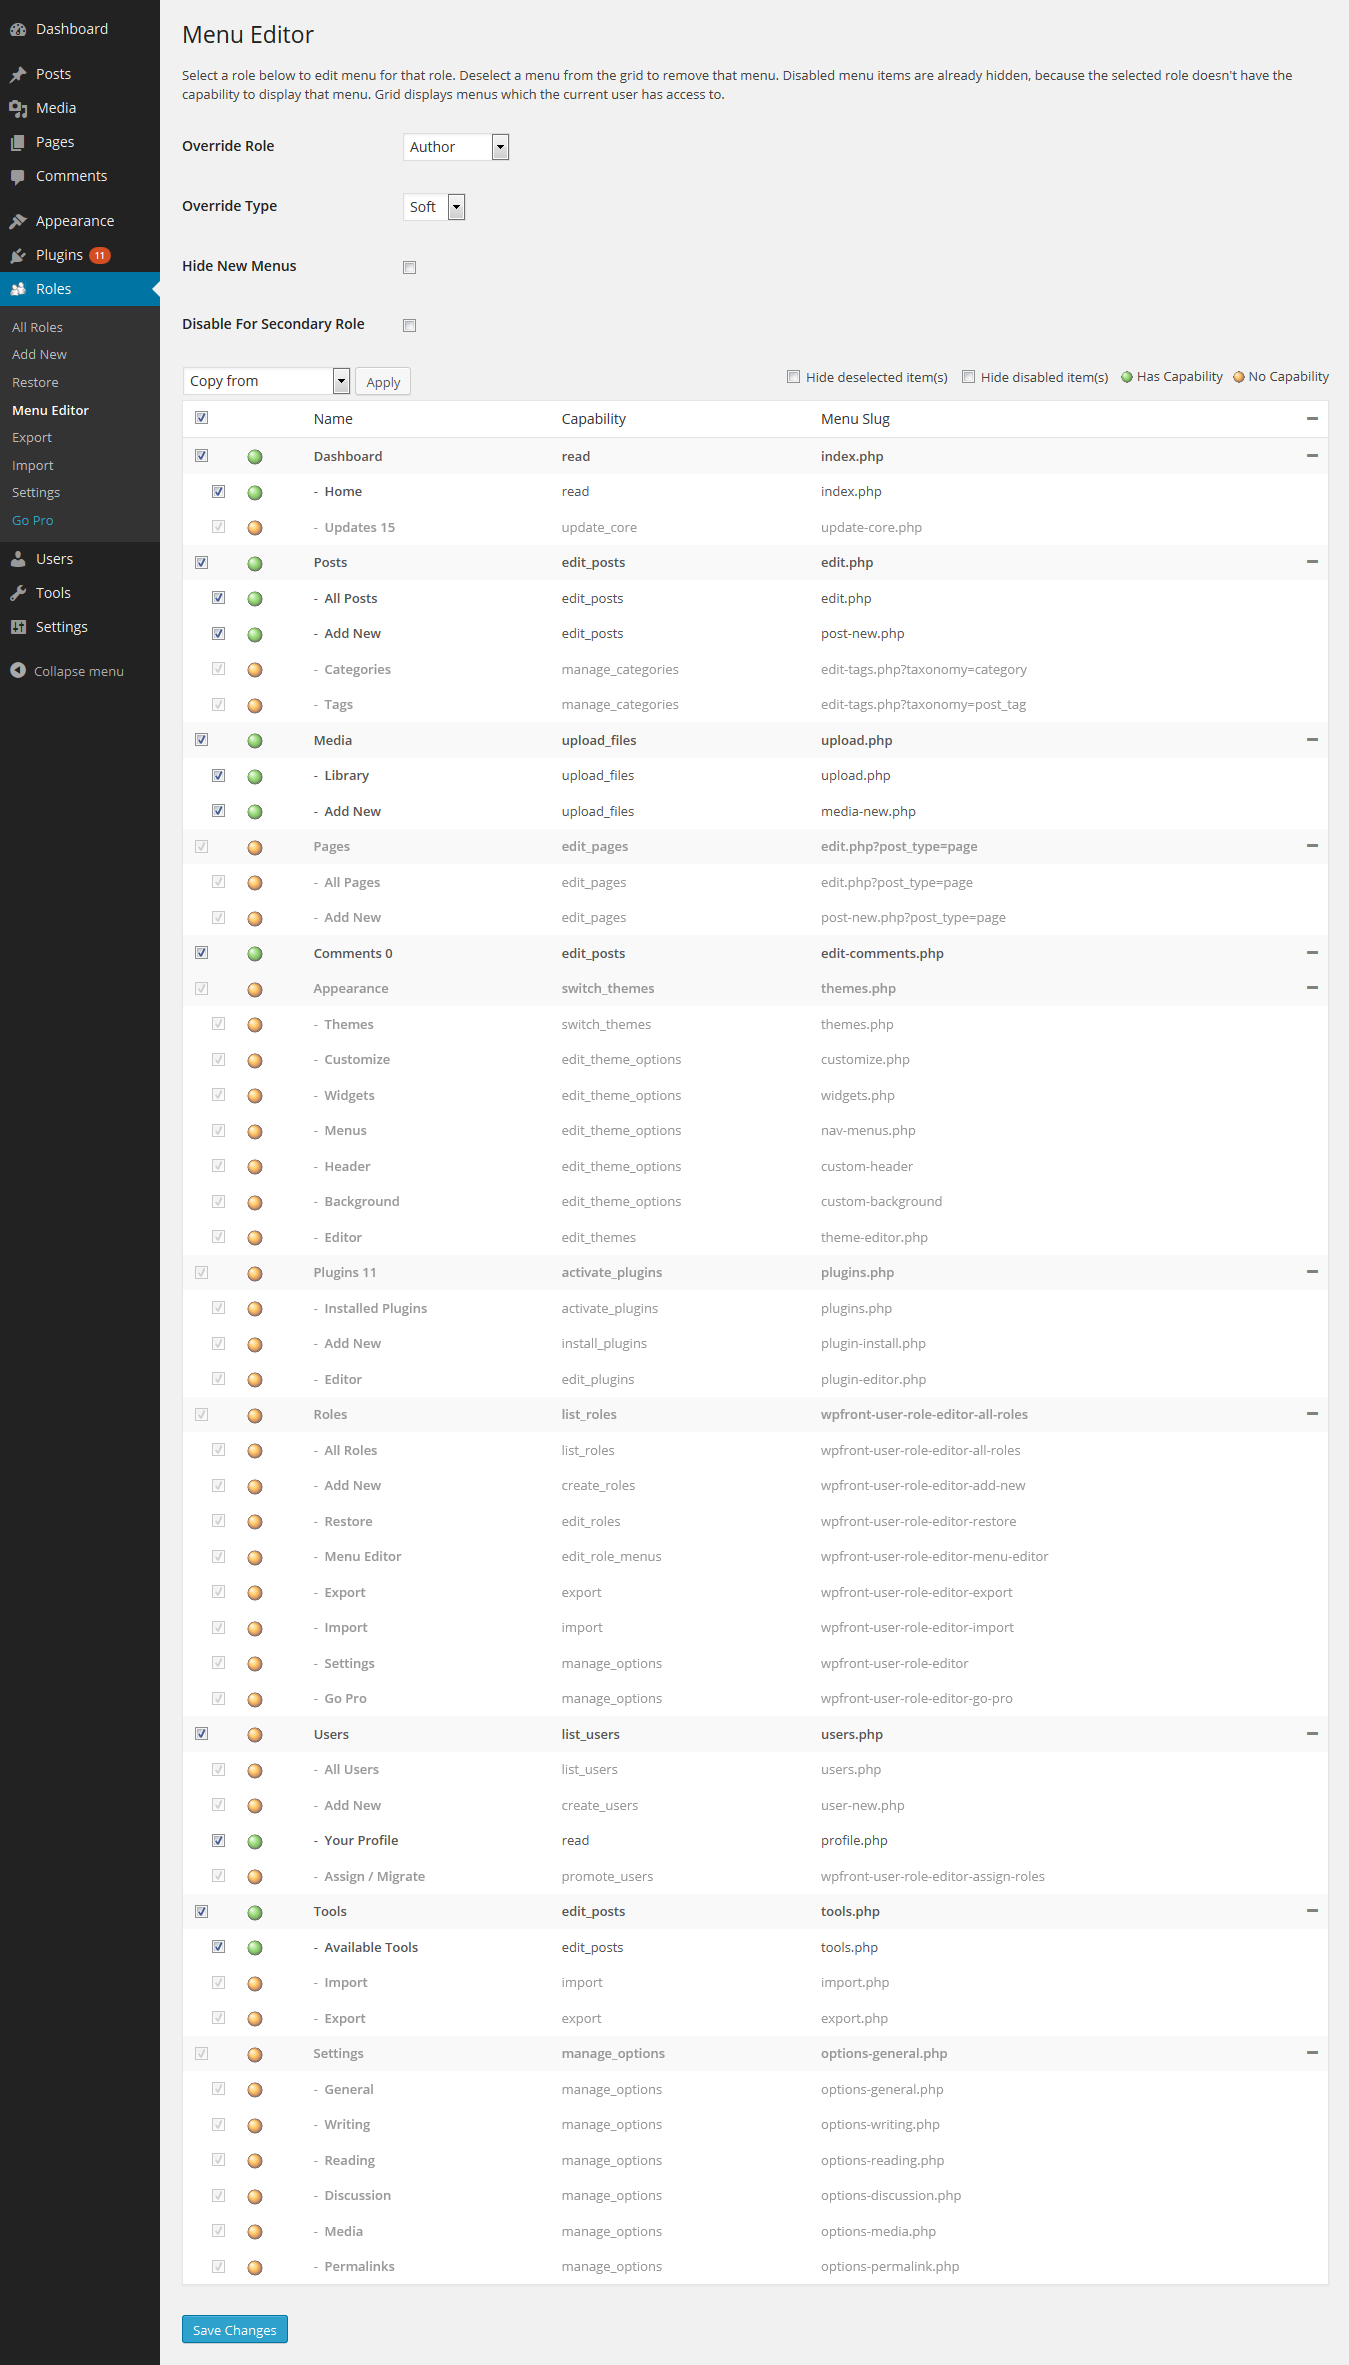
This screen allows you to enable and disable admin menus for a particular role.
Uncheck the check box to disable that menu for the selected role. If the role does not have the capability required by the menu the check box will be disabled and the menu won’t appear. A green dot indicates that the selected role has the capability and an orange dot indicates that the selected role does not have the capability.
Use the Hide deselected item(s) and Hide disabled item(s) check boxes to filter the currently displayed menu items based on its status.

The grid displays name of the menu, capability required by the menu and menu slug used by WordPress to identify this menu.
Override Role: Select the role you want to override within this drop down.
Override Type: This is either Soft or Hard. Soft is the WordPress default. When you remove a menu using the WordPress API, that menu will be removed from the WordPress admin menus, but you can still access that page by directly typing the URL to that page. This depends upon the type of page you are trying to access. Hard setting allows you to override this behavior. If you set override type to Hard, the page won’t be accessible even through the URL.
Hide New Menus: Enable this setting if you want menus created or added to be hidden which does not exist at the time of menu editing.
Disable For Secondary Role: Enable this setting if you does not want the menu editor to work when the role selected is a secondary role for the user.
Use the Copy from drop down list to copy existing configuration against a role. You can use the Restore Default option available in Copy from drop down to restore default menu configuration.
This screen displays only menus which the current user has access to. Any menu which the current user does not have access to will be treated as a new menu.
Topics
Posts/Pages Extended Permissions
Media/Attachment File Permissions
Content Restriction Shortcodes
